Cold, Hard Steel - Off with the undercoat and fill in the blanks
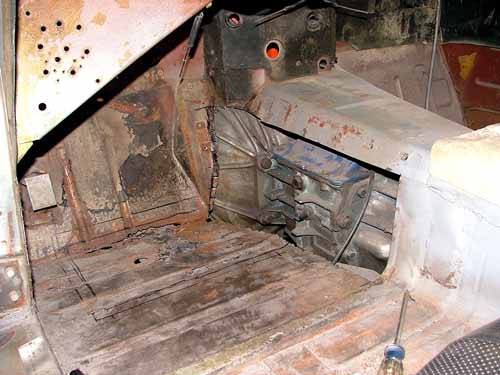
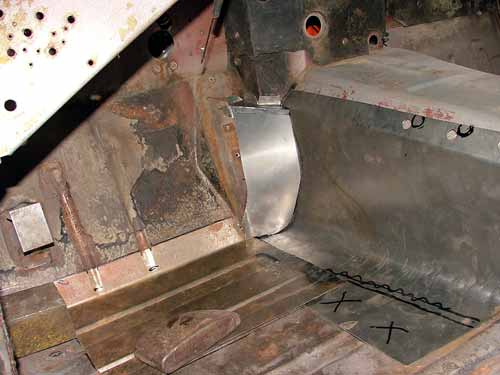
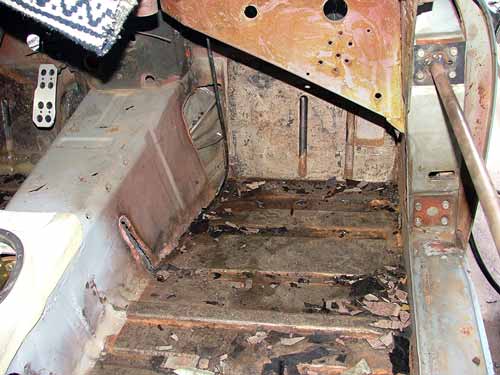
The size of the bell-housing for the T-5, along with some rust in the floor and a cutting torch happy PO created the need to reconstruct the trans tunnel and foot well. I began by cutting out the warped, hammered, and hacked side of the tunnel. Then I determined how far everything else needed trimmed and marked those areas.
I couldn't do the job without my shop supervisor in attendance - unfortunately he was more interested in recreation than work......
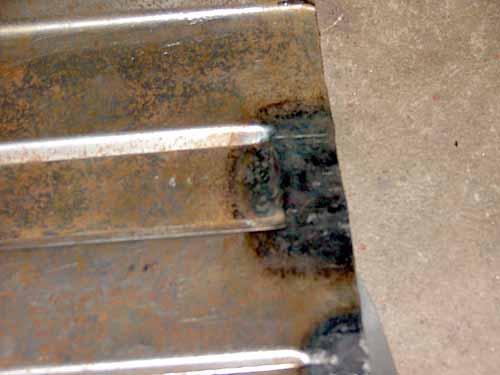
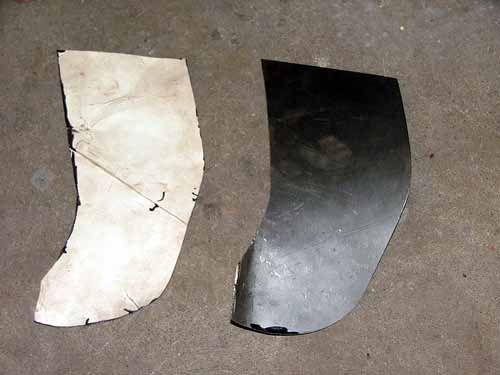
First piece was a section of patch panel purchased from Ross, which had the matching channels rolled into. Where it would meet the tunnel side, I heated the sides of the channels with the oxy-acetylene and hammered it back flat, as well as re-heating it and applying a soaking wet rag to shrink the metal back and make the edge flat and straight.
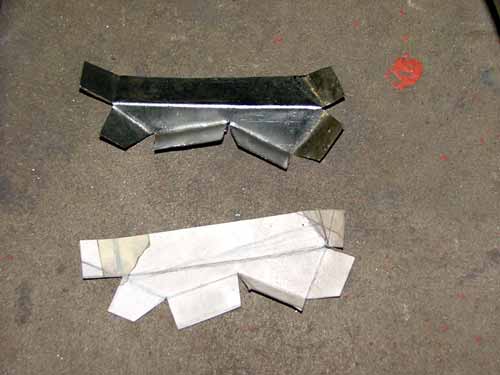
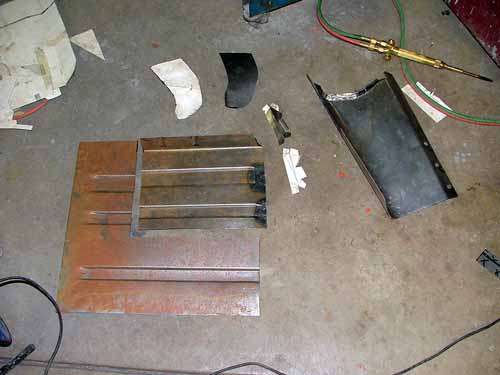
Next two parts to fab were an angle piece that would define the angle of the bulged area for the bell-housing, and the replacement side of the tunnel itself. Chipboard templates were used to figure everything out, then transferred to sheetmetal and formed.
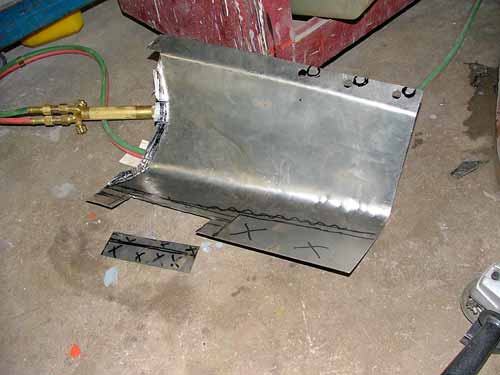
The three main parts in place, held with a combination of dollies, etc. Another piece of chipboard was slowly trimmed to fit, pressed against the tabs bent up on the side of the tunnel, firewall, and angled top piece, to make a template for the compound curved bulge.
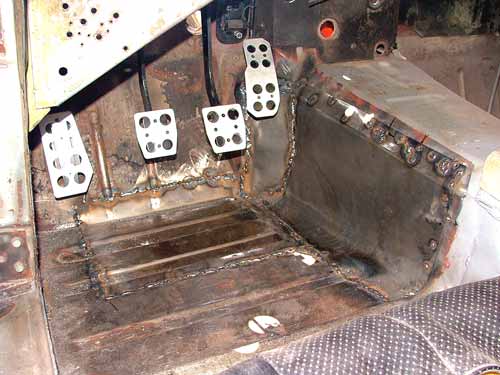
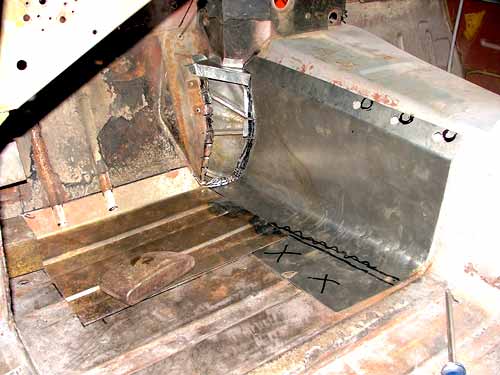
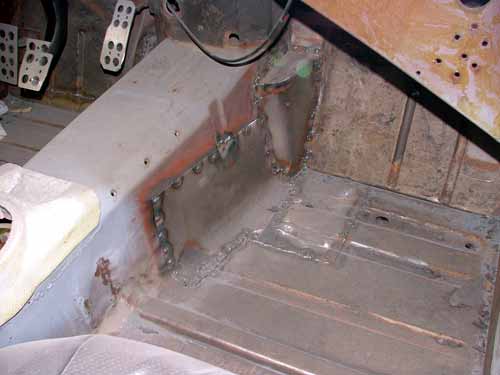
Here's all the pieces test fit, then welded into place. A combination of plug and lap welds tie it together. Still have to be ground, but that will wait till its on the rotiss. Also messed around quite a bit with gas pedal placement - the bulge in the tunnel kept getting in the way. This final arrangement will still allow full travel, and heel-toe, but not in the traditional fashion - toe will have to be on the gas...guess I'll get used to it.
Then, on to the passenger side where the template was already made......until I realized that I needed to strip the sound deadening asphalt. I remembered how much of a pain in the arse that the driver's side foot well was - used a heat gun and putty knife. So, I decided to try a method I had heard about, but wasn't sure if it was an urban legend - using dry ice to remove undercoating.
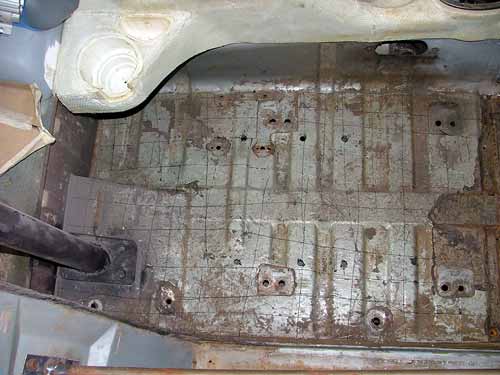
First I scored the stuff with a utility knife to hopefully make it break into small pieces.

A quick trip to the local dry ice distributor got me 20lbs. of pellets for $12. I chose the pellets because I thought they'd be easy to spread around. Be SURE to wear thick gloves if you try this - dry ice can and will stick to bare skin and cause SERIOUS INJURY. The dry ice was packed in tightly folded brown paper bags, so I transferred it to a large plastic trash bag so I could spread it around inside the bag to over the most surface area.
I covered it with an old mexican blanket to keep the cold in, then waited for 15-20 minutes while enjoying a tasty beverage...
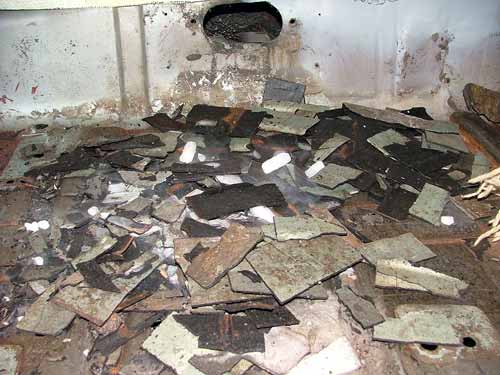
Remove the blanket, move the dry ice out of the way, pop the floor a couple of whacks with a rubber mallet, and PRESTO...the stuff popped off in chunks like shale on a riverbank!
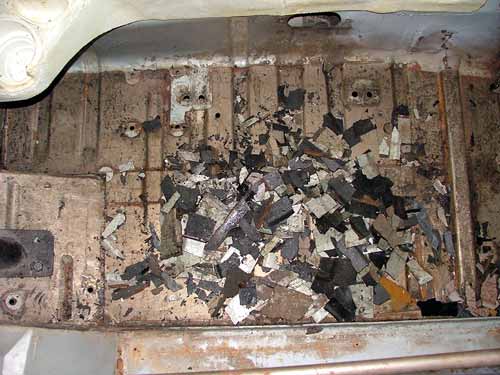
Sure, a couple of areas need re-cooling, and some chipping with a putty knife, but the whole operation of stripping the passenger side, and the remaining half of the driver's side took all of an hour - most of that spent waiting for things to cool. As I worked on popping the stuff on one side, I had the ice on the other.
And when I was done, I wowed the kids ( and neighbor's kids) by throwing glovefulls of the "ice" into a bucket of hot water and filling the drive with gobs of fog!!!!
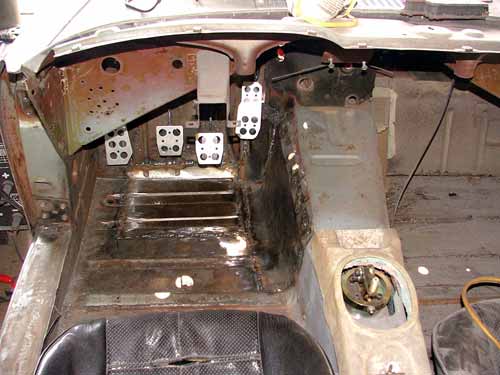
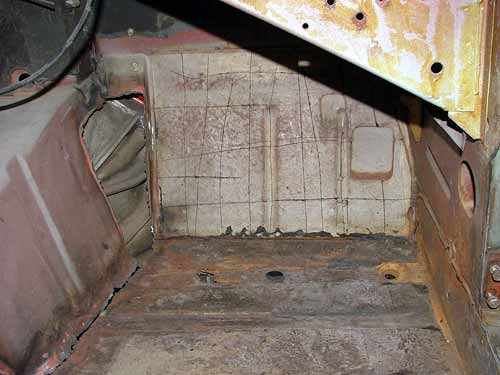
Here's a shot of the completed passenger floor / tunnel
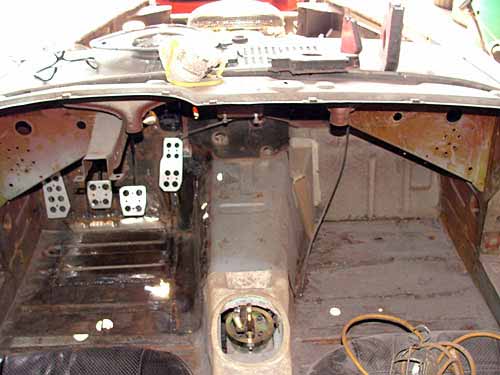
I had to find a different way to actuate the e-brake, since the stock e-brake handle goes across the trans tunnel and wouldn't fit because of the fat driveshaft and trans tailshaft. I browsed Ebay til I saw this handle off a Merkur, which looked like it could be mounted to the floor - $10 with shipping. Had to heat and bend the mounting ears to mount flat, since it must have sat on two offset, parallel surface in the Merkur.
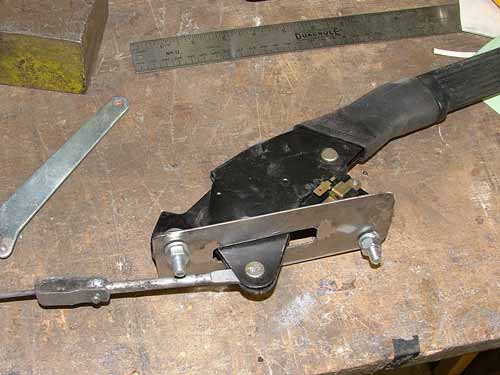
Fabbed a doubler plate that will be welded to the floor pan to reinforce the mounting area, and a bracket to hold the ends of the two brake cables.
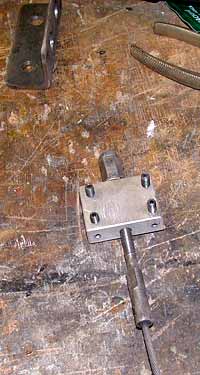
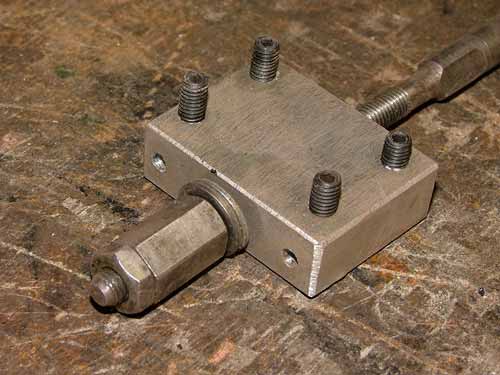
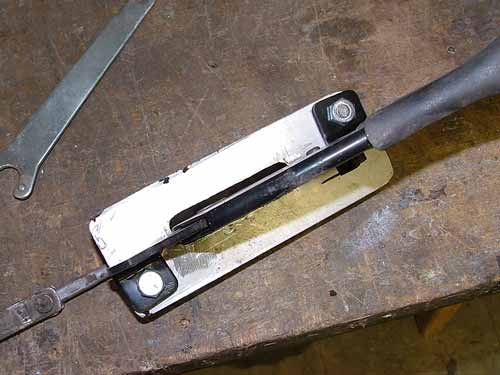
And machined up an aluminum splitter block. It has a central hole that fits the stock Datsun adjuster, and two holes for the cable ends which will be secured with two set screws each - I "borrowed" the idea from Lokar.