Come Together...right now...over me...
Or you can call me AL
Now that the holiday's have come and gone, and the Chinese are celebrating New Years, I can get back to the "R". I've got a game plan to have it on the road this spring, and its a juggling act to get things done in the proper order for reassembly.
Before I can drop the body back onto the frame, a number of things have to be completed. These include permanently installing the rollbar and seats, and before I can do that some of the AL interior had to be fabricated.
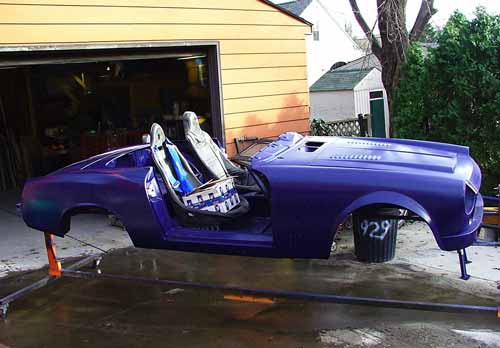
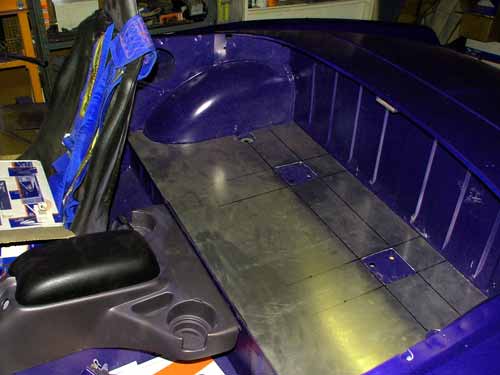
Here's a pic of the body tub in the sunlight
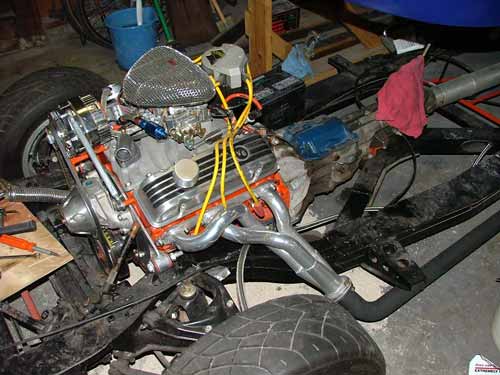
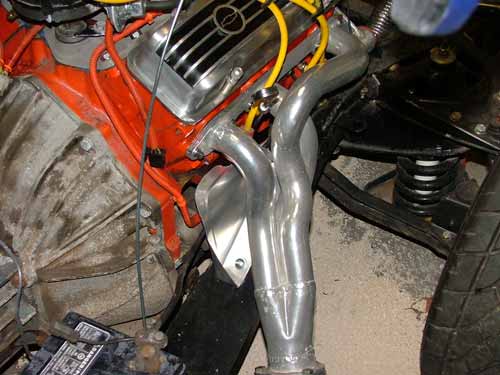
If you remember, the Eastwood coating was junk, so I had the headers and tips ceramic coated.
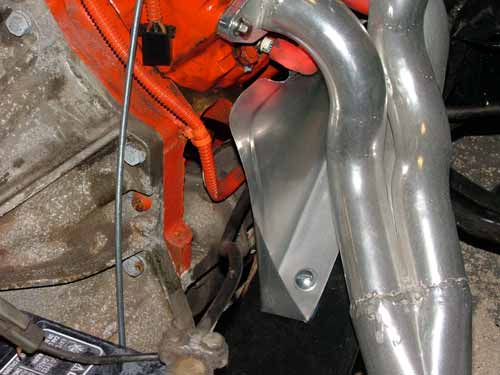
When reassembling, I realized a heat shield for the starter and wiring would be a good idea, so I made one up out of AL - uses one of the stock threaded inserts, and a rivnut to mount it to the frame.
I didn't feel like welding up all the holes for hear hoses, valve, etc in the firewall recess, so I made up an AL panel to fit. For the cowl drain, since the "R" is far from "correct", I found a sump pump hook-up kit in the plumbing aisle at Home Depot. It contained 10' of the correct diameter corrugated poly hose, and 2 SS hose clamps for about $6. As you can see, the hose bends nicely to the tight bends, and the ends have a smooth bore portion that's a perfect fit for the cowl drain fitting. Such a deal..... The stock, two-prong "clamp" is a little weak, so after the brake lines are installed, I'll put a ziptie around them to hold the hose tightly in place.
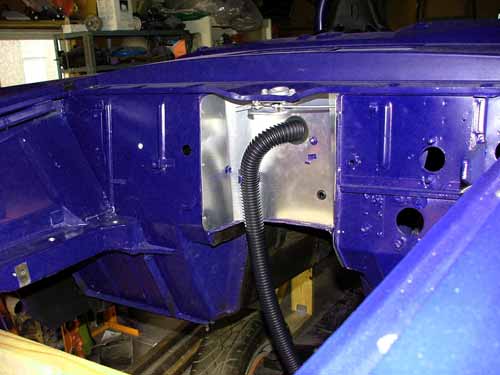
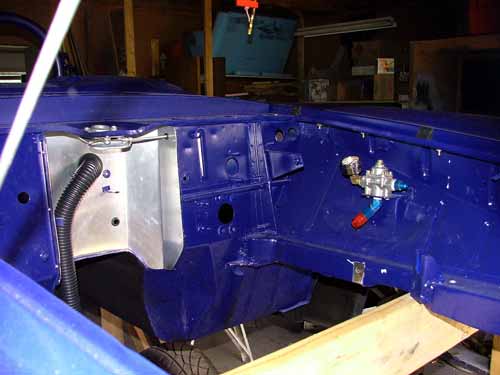
While I was under the hood, I decided to hook up the hood release. So, that required making up one of the AL interior panels to fit the driver's side dash brace. The beading on this panel will give a hint of what the rest of the interior will be - 0.30" 3003 H-14 AL. The finish will be a brushed look, achieved by scuffing the panels with a fine 3M Scotchtbrite pad. Saw this technique used on Discovery Channel's Great Biker Build off, by Russell Mitchell of Exile Cycles. I like the aged, rich dull sheen it yields and it will be MUCH easier to maintain than polished would be.

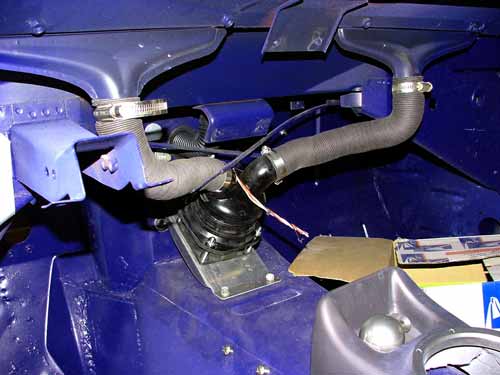
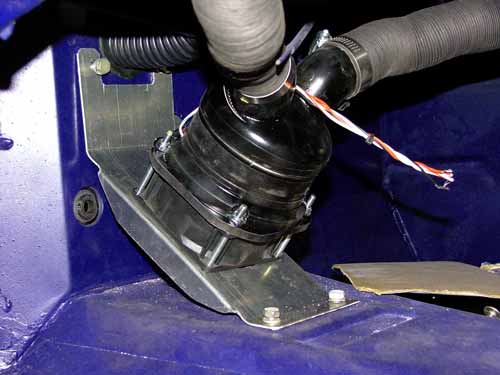
Next fab job in the interior was to make up a mount for the custom defroster. The mount was made from 0.05" 6061 T-6. The returns on both sides make it very stiff. The mounting surface has a 3-1/2" thru-hole for the fan, and the fan grille is mounted on the underside. The grommet in the lower right picture is for the engine harness.
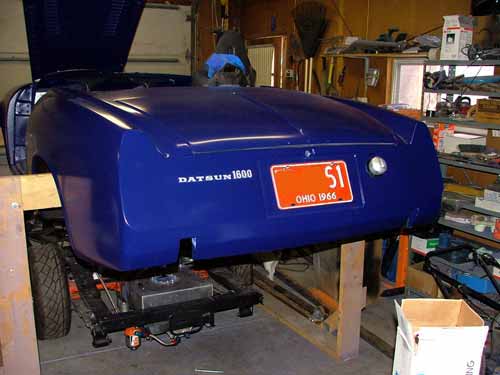
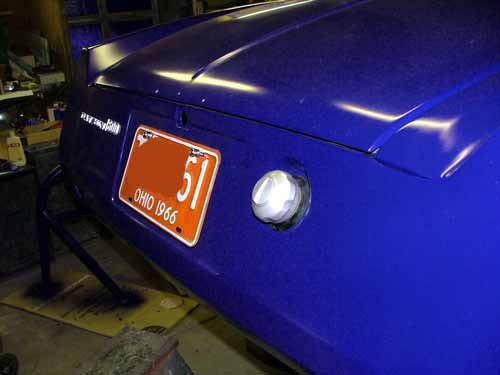
A couple of shots of the rear end. The dummy gas cap is a glass-micro-balloon filled urethane casting that weighs about 2 Oz. That original '66 Ohio plate has the same aged suede finish as the body....here in Ohio, you can register a historical with correct YOM plates. I'm using Lite-n-Bolts for license plate illumination.
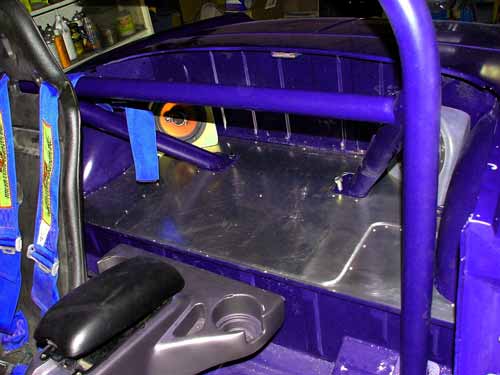
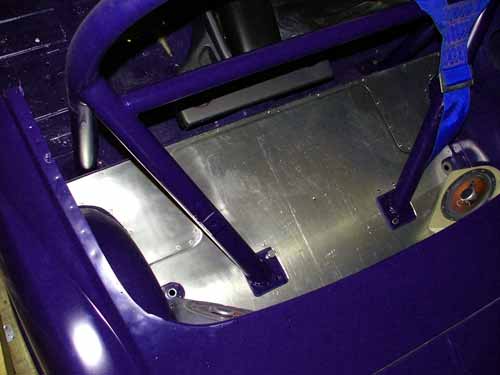
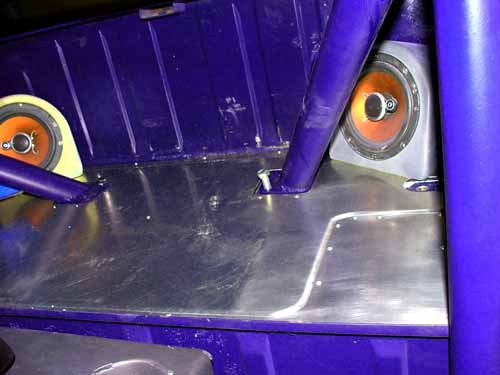
Before I can drop the body for the last time, I had to fab and install the AL for the parcel shelf. As always, a chipboard template was made, then transferred to the AL sheet.
I didn't get any pics of it, but I installed two layers of sound-deadening - one on the shelf, and one on the back of the AL panel. Searching numerous sources on the web and the USENET, I found a material that has the same specs as Dynomat, but the foil is unprinted. Its actually a roll roofing material called Peal & Seal from MFM Building Products Several articles / postings- related comparable performance to Dynomat, and at $80 for a 100 sq. ft. roll its a bargain - I figure what I have left over will go on Ebay.
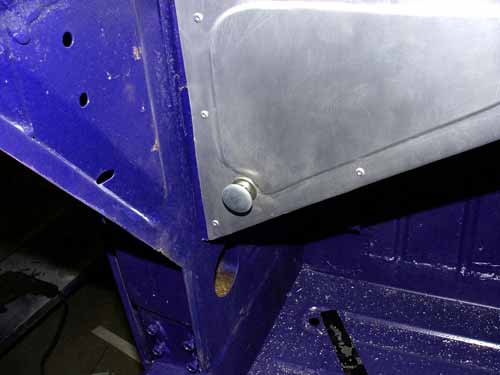
Ric Campbell of http://bigwigracecars.com offered lots of good advice on AL interior panel construction. The panel was beaded, then installed with pop-rivets. A section of the driver's side was quickly hit with the Scotchbrite - I'll do all the panels evenly before permanently installing the bar.
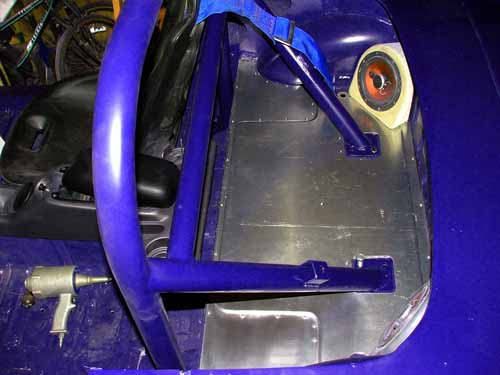
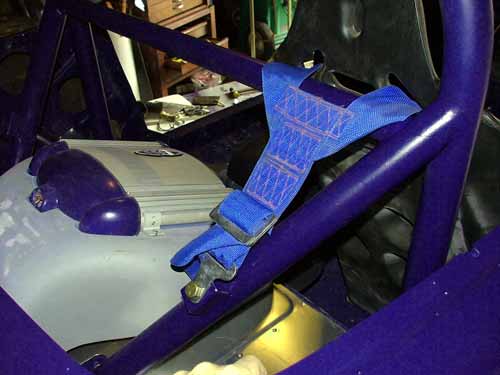
The crossbar and 5-point mounts were added to the bar, and painted.
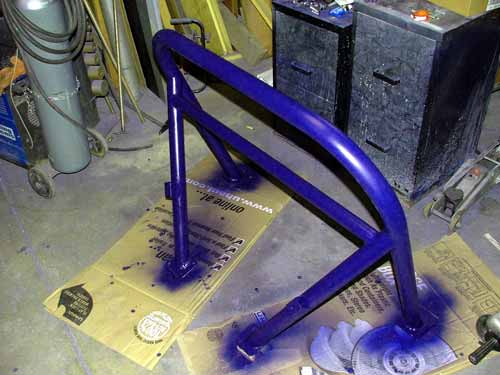
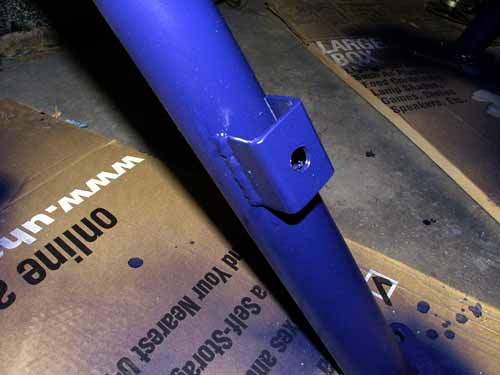
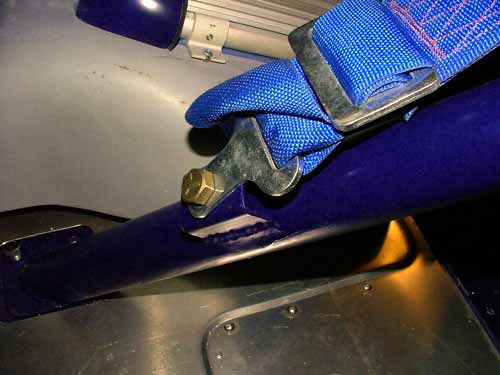
The 5-point mounts were fabbed from a leftover piece of 1.5x1.5x.125" box tube, sited to allow the shoulder belts to lay smoothly on the crossbar
Next up will be a few more interior panels - the rear side panel and rear firewall will be easier to make without the rollbar in the way. Then on to wiring - here and there during the last several months I've gotten the circuit diagram, harness colors, and fuse/relay panel mapped out, so the actual job of making the harness should go smoothly.
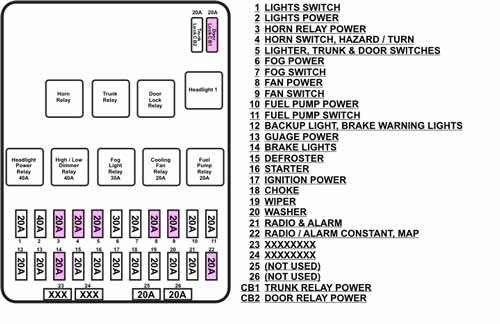
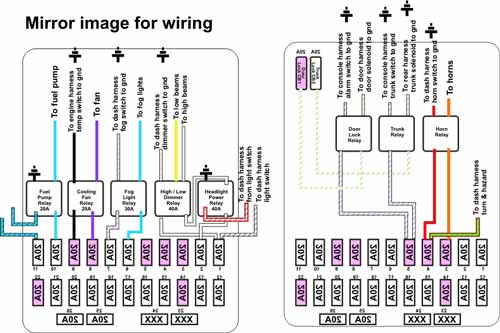
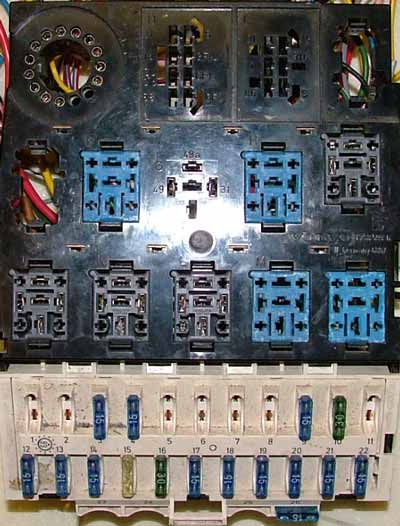
The fuse relay panel is out of a Volvo740 - it has a mounting base that the panel snaps into, 26 fuses, and a bunch of interchangeable relay sockets. I got it from a Volvo only wrecking yard for $20, and the yard guy let me switch some relay sockets from a second panel so I had all the sockets as standard, Bosch style, 5-lug relays. All the connections on the back are 1/4" spade connectors which let me easily customize the connections.
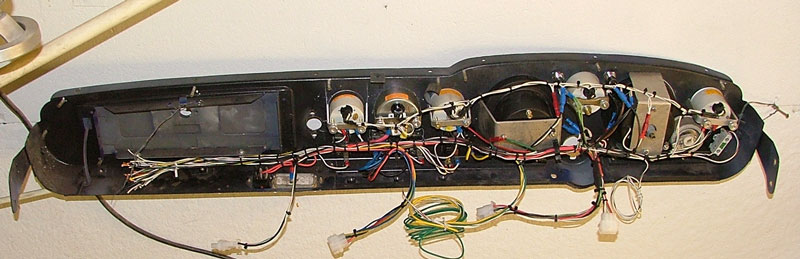
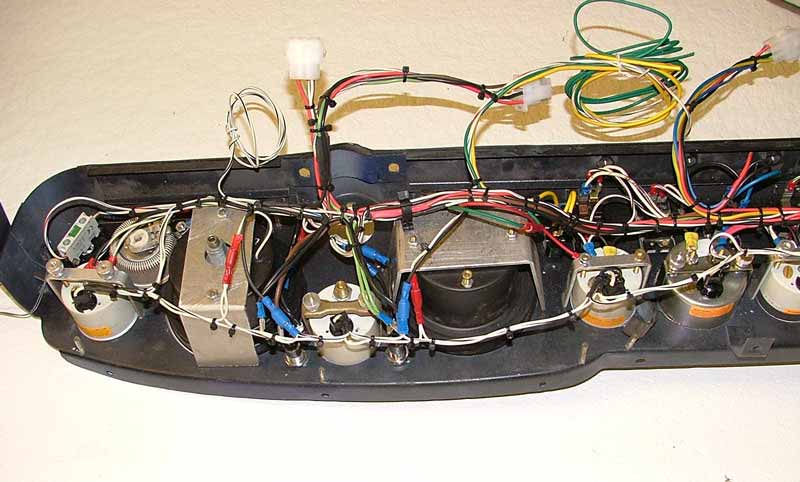
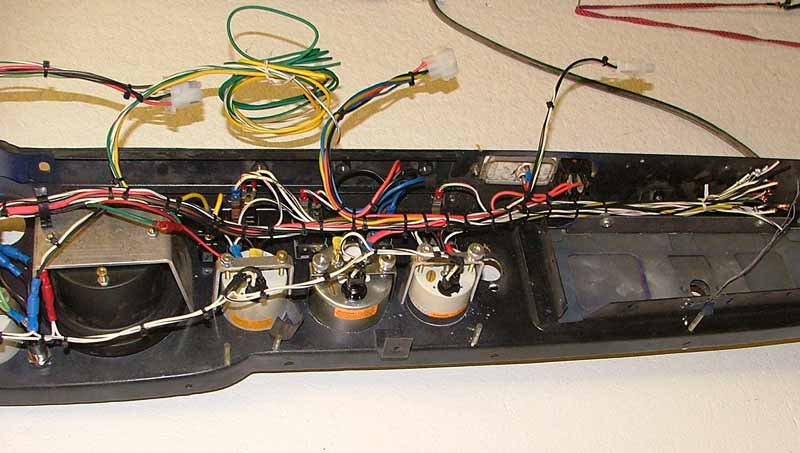
Also got the dash harness made up. Still have to install the AMP connectors for a the main junctions to the fuse/relay panel and a couple of other - need to install the dash to determine lengths.
Well, that's it for now, stay tuned..........