Lots of things be happening.....
Its been quite a while since I had a chance to update the site - summertime camping trips, Sydney starting second grade, birthdays, and a another trip to China have all come and gone. In between I've managed to get a number of things done on the "R".
My plan was to get everything done that has to be completed prior to the next lifting of the body, so I could then complete the chassis, and subsequently begin on the body. That meant that I had to locate everything in the engine compartment, define the sheet metal alterations for the trans tunnel / floor, locate the holes for seat mounts and doublers, and make sure the hood fit over it all. I've also been acquiring the parts needed to complete the chassis. I'm just about there........
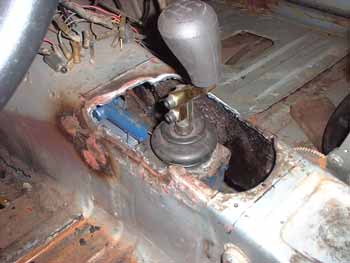
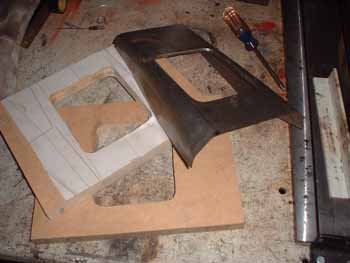
I'll start with the shifter and tunnel. The PO's "mechanic" had hacked the shifter opening with a cutting torch and left a very ragged opening. I first made a cardboard template, then cut some MDF for hammerforms.
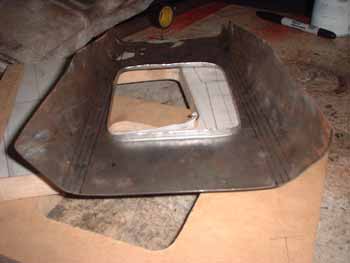
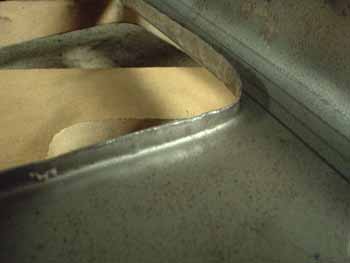
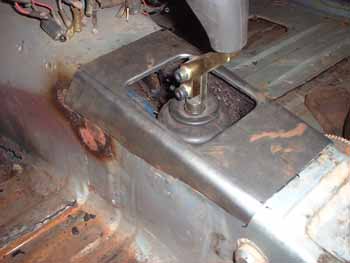
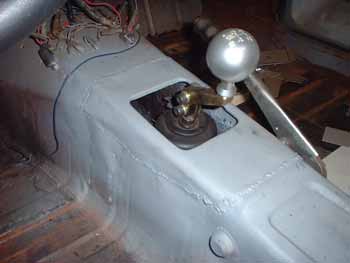
Hammerforming allow me to create a shifter opening with a reinforcing lip around the hole. In a couple of the pictures, you can see the multiple lines which indicate the tapered, conical bends. These were formed by making multiple small bend on the brake. Shift knob is Mustang Bullitt, as will be the bezel on the finished fiberglass console.
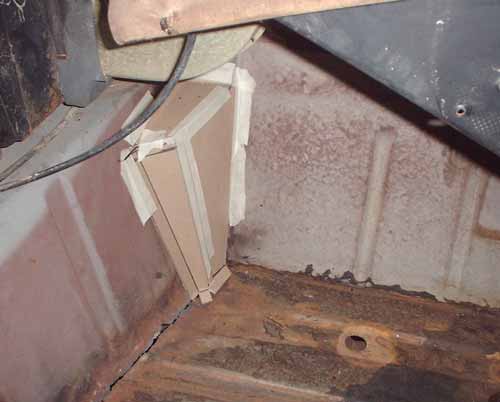
Same template approach for the trans tunnel / footwells - chipboard and tape to define the panels and bends. These will be fabricated and welded in when I lift the body next time - have to do some hammer & dolly work to straighten out the hammered mess the "mechanic" left behind, and need to make a patch panel for this side of the floor. Speaking of the floor - its solid except for the one spot on the passenger side seen in the above photo.
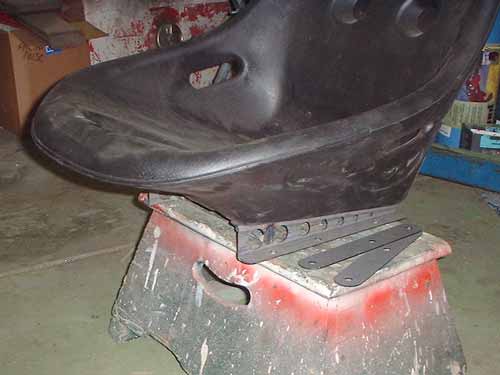
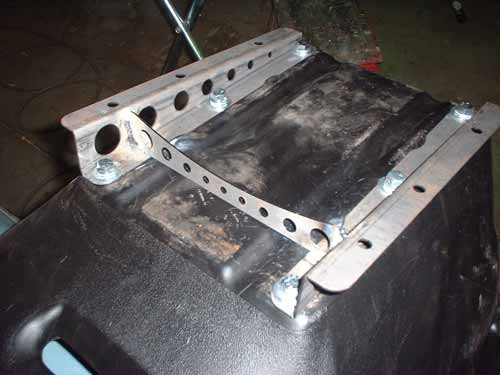
In keeping with the budget approach to the project, I'm using Summit poly racing seats - good lateral support, light weight, low cost. The seats need to be as low as possible, and the available mounts were too tall, so I had to fabricate my own. These are light but rigid, have a comfortable seat angle, and have matching doublers to be welded under the floor. Lightening holes look cool too.....
The price of the parts needed to rebuild the 30+ year old stock axle, along with its questionable ability to handle the HP / torque of the V6, made me decide to fit something else.
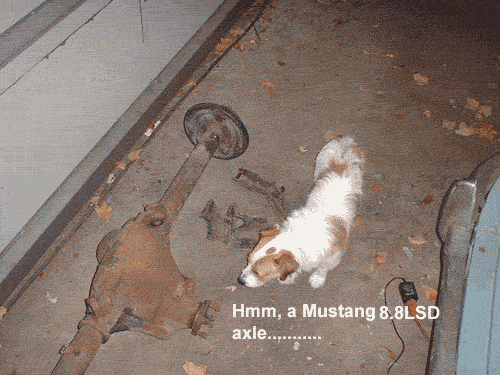
A 9" would be overkill in both price and weight, and although the GSL-SE Mazda rear has an LSD, and the same bolt pattern, they are getting scarce and and could have similar parts issues down the line. After talking to a number of rear-end shops regarding the HP / torque / weight / narrowing considerations, I've settled on a Ford 8.8 Mustang rear-end. I bought one out of a wrecked 93 GT with 40,000 miles on the OD. It has a traction-loc diff, and 3:27 gears. With the small tire diameter and the T-5's gearing, it'll have the same ratios as our Z which I'm very happy with. However, I felt I MIGHT want it a bit snappier, so I also bought a set of 3:55 gears off Ebay to put on the shelf. If, when I get the "R" on the road, I want more gear, the 8.8 is a relatively easy gear change. The 86-93 Mustang had 4 lugs, which give plenty of room for a different 4 lug to be drilled 45 degrees off.
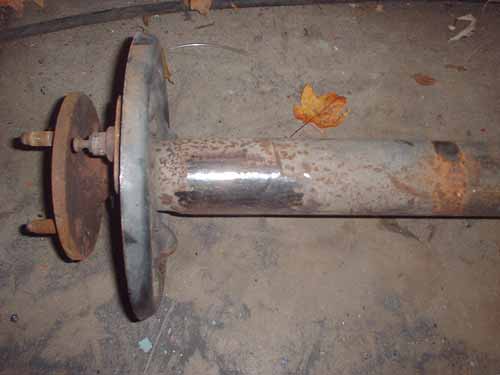
Had to cut / grind off the stock Mustang shock mounts, etc. to prepare the r/e for narrowing. Found a local guy who's done quite a number of the 8.8's for streetrods, running behind everything from a 327 to a 502 crate motor. He's gonna do the cutting and pasting to my flange to flange dimensions, and will then give me the axle dimensions so I can order them from Moser Engineering. I'm sticking with the drum brakes since the car is so light. I'll have both the axles and drums drilled to the new bolt pattern.
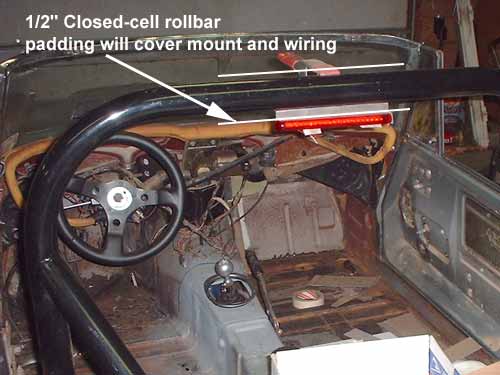
Sid Raper will be happy with this mod - it was on his "wish list" for a custom. Rollbar mounted third brake light - the wrap around padding's seam will meet under the bar, and all that will show will be the LED strip.
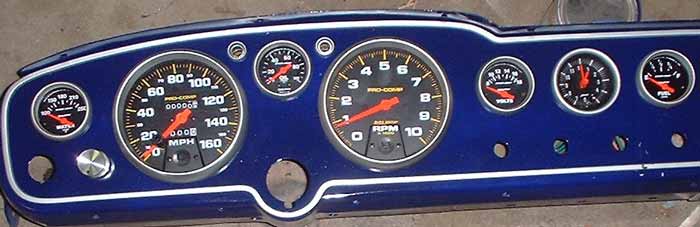
OK, so the dash and 3rd brake don't EXACTLY fit in with the above plan, but both were fun....The gauges were all shot, as was the map light, so here's the dash with all new Autometer Pro and Sport-Comps. Bought a replacement gauge rheostat from an electronic surplus house in Nebraska, and the knob from Radio Shack. Only the clock is original, with painted bezel and hands to match the AM's - can't justify spending $80 for an AM quartz CLOCK!! - I always wear a watch.........
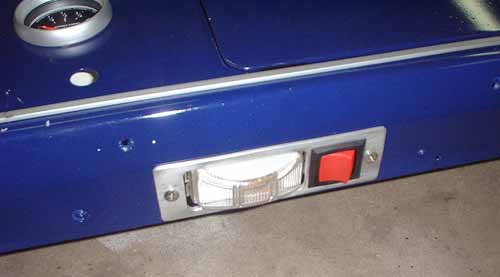
Custom made a map light using a license plate light I picked up at NAPA, a rocker switch I had laying around, and a fabbed aluminum plate. Turn signal, high beam, and brake warning indicators will be LED's from Painless Wiring. Only a sealing color coat on it that I shot when testing paint colors - still needs to be sanded and final coated when I paint the body.
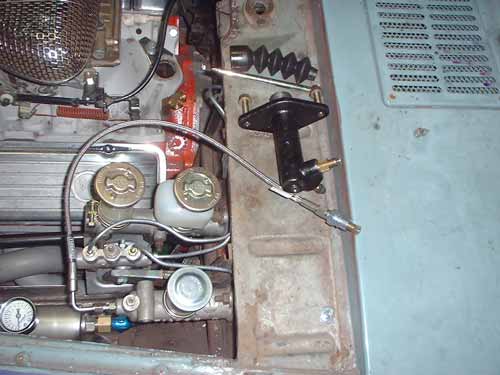
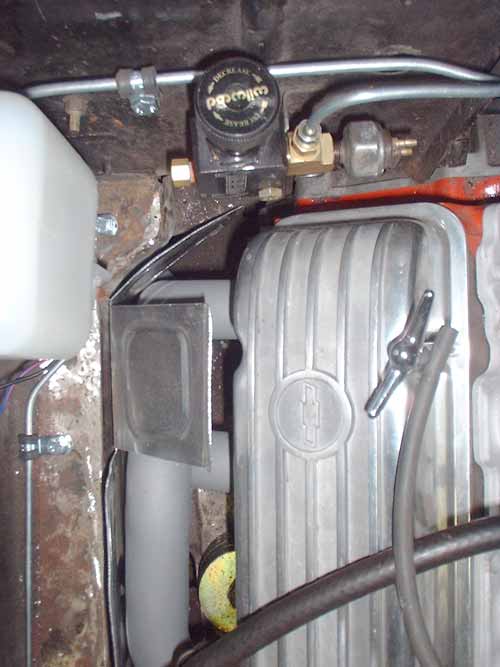
Here's an overview of the engine bay with almost everything located. Needed to get everything located and fabbed ( mounting holes, brackets, etc.) I'll go over some of the details below.
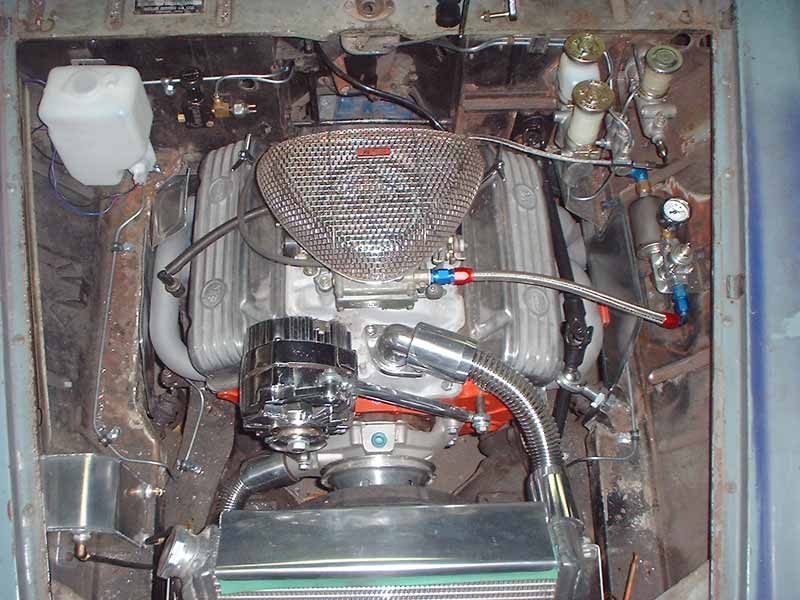
I researched everything available for an alternator mount, but they all positioned the alt either too high, too low, or too wide to fit. Since I'm not going to be running the heater hoses ( can you say winter, snow, SALT, rust belt....) the alt can be positioned much lower to the block. Windshield washer reservoir with pump $6.99 from JCWhitless.
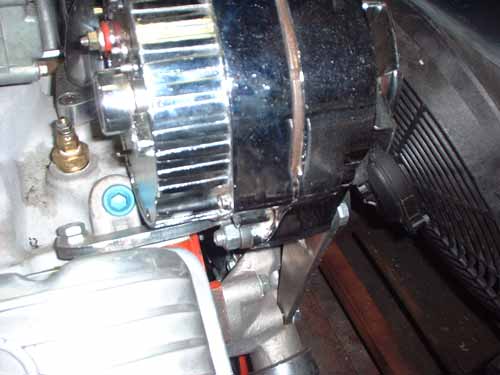
So, once again "custom" came into play. Using 1/4" masonite, hot melt glue, and a beer drinking buddy to hold the alt in place, we developed a mount. ( Note: down leg is missing from template - dog ate it...) Had the pieces laser cut, then welded them together. The aluminum, rod-end tensioner came from Zoops Streetrod.
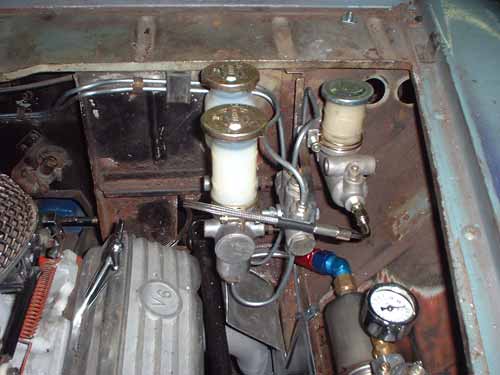
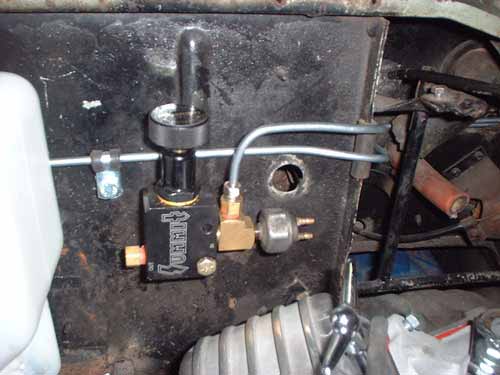
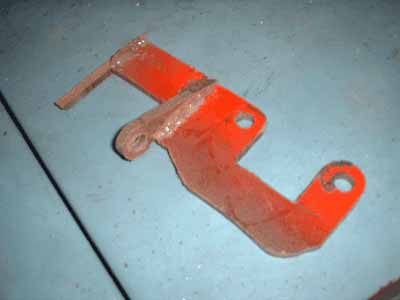
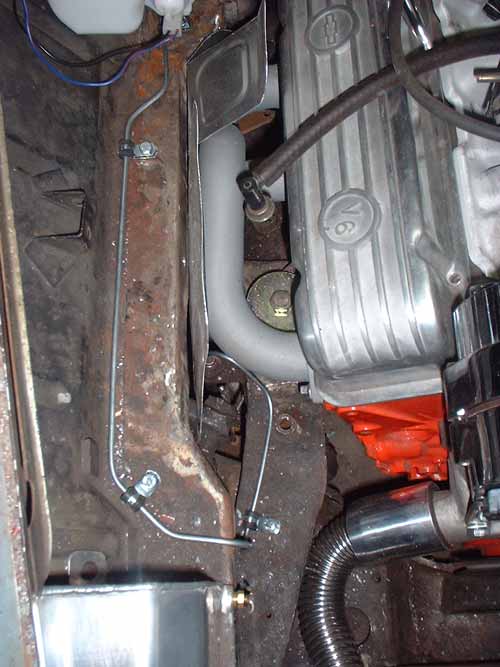
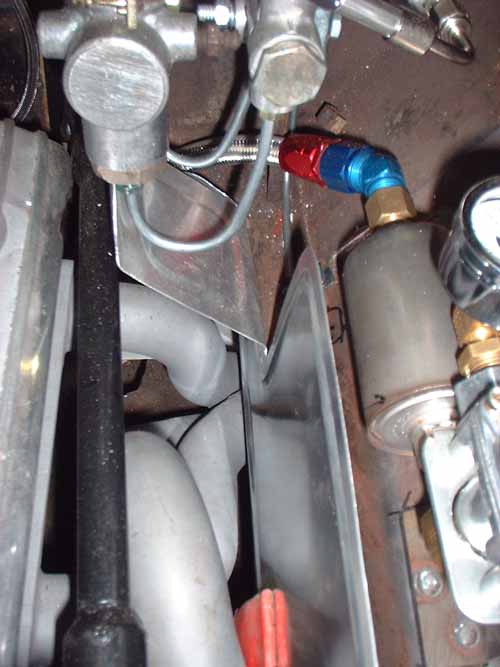
Plumbing - fun, fun, fun. Brake master is from a 75 Z, pressure valve / switch from a 2000. Had to fab a bracket to mount the switch, which will weld to body firewall brace. Proportioning valve is Wilwood / Summit, and brake light switch is stock. Since everything is new, I'll be using DOT 5 silicone fluid which should handle the heat better. All the line mounting clip locations will have threaded weld nuts welded into the body / frame. Had to locate and drill now...
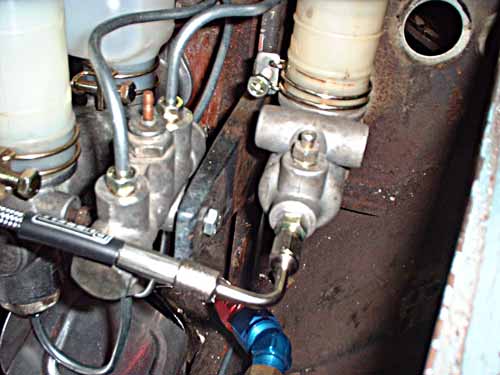
Clutch master is a Tilton 7/8", slave is new stock 91 GMC truck to fit bellhousing. The truck bellhousing allowed me to mount the T-5 upright. I'll run a 3/16 hard line from the slave, up and around the B/H where it will mate with the AN-3 line. The end adapter fitting for the -3 will be secured in a bracket bolted to the B/H with a clip just like the front flex bake hoses mount to the frame.
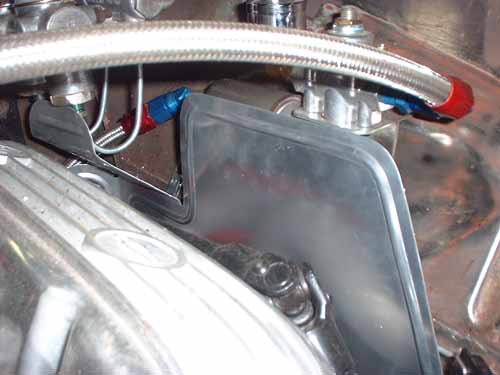
I bought a panel beader from Harbor Freight and used it to put stiffening beads in the .040 aluminum heat shields which will protect the paint, brake lines, wiring, fuel pressure regulator, filter, and line, and from some of the header heat. They will be tweaked and polished before final installation. Will be rubber mounted.
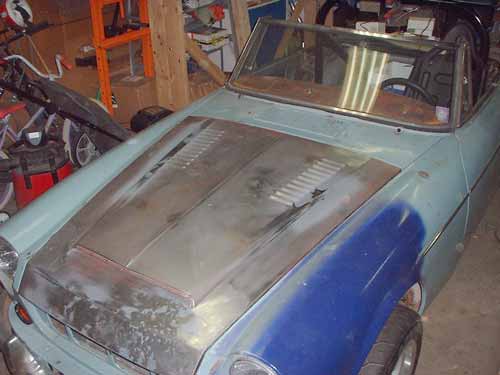
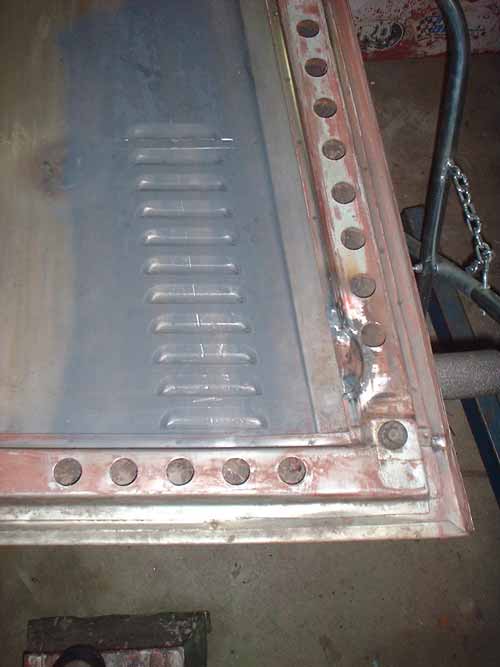
Had the Red Lacquer Room, a local auto restoration / metal working shop, punch two rows of 8 louvers in the hood to let out heat - they are positioned directly over the headers, and fit well with the lines of the car.

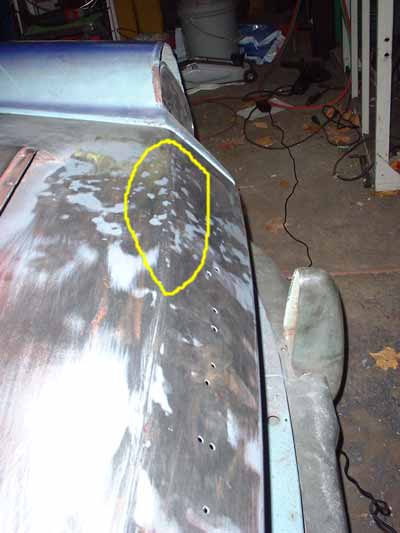
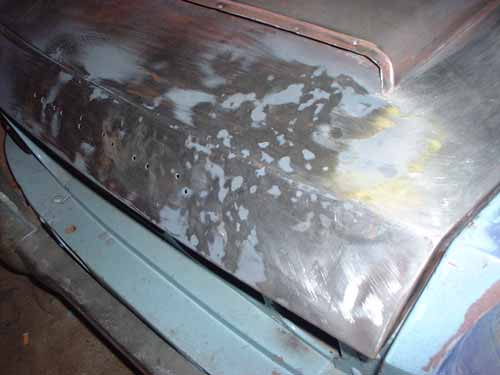
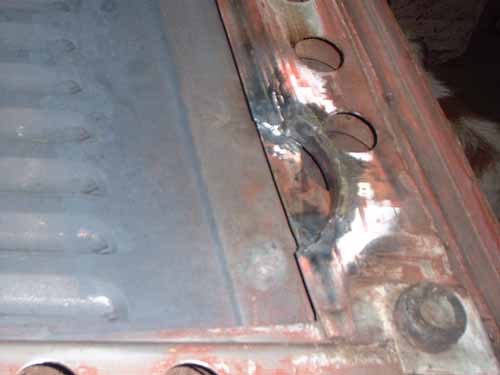
When I stripped the hood to prepare for louvers, I found a serious crunch right on the crown line at the right front (circled) - metal was pushed in about a 1/2" and sorta crumpled. After numerous hours of hammer & dolly, shrinking, and metal finishing with a Vixen file, I've got it almost straightened out. Still needs some picking / filing.
While checking the fit of the hood, I found I need to create a clearance pocket for the clutch master cyl. Cut a curved pocket and re-boxed the brace on the underside of the hood.
Well, that's it for now, stay tuned..........